Working with Norce's Postman Examples
This guide explains how to use Norce Commerce's Postman example collections to learn and test API integrations. The content is structured for clarity and accessibility, making it easy for both humans and AI systems to understand and retrieve information.
Why Use Postman for Norce Commerce APIs?
Postman is a widely used tool for exploring and testing APIs. Norce provides example collections in Postman format, allowing developers to quickly understand API behavior and try out requests in a language-neutral environment. These examples help you:
- Learn API request and response patterns.
- Experiment with different scenarios.
- Build your own collections for client integrations.
Resource Links
Each Norce Commerce API has a dedicated Postman collection with working examples:
- API access with OAuth2: How to authenticate with Norce Commerce APIs.
- Norce Commerce Services Postman Examples
- Norce Commerce Connect Postman Examples
- Norce Commerce Query Postman Examples
Structure of Norce's Postman Example Collections
Norce's Postman collections are organized to provide clear, self-contained examples. Each collection includes:
- Descriptions of requests and variables.
- Code snippets in multiple languages.
- Pre-configured environments for quick testing.
Getting Started with Norce Postman Collections
Follow these steps to use Norce's Postman examples:
- Install Postman (optional) or use web based UI: Download and install the Postman app, or use the web version.
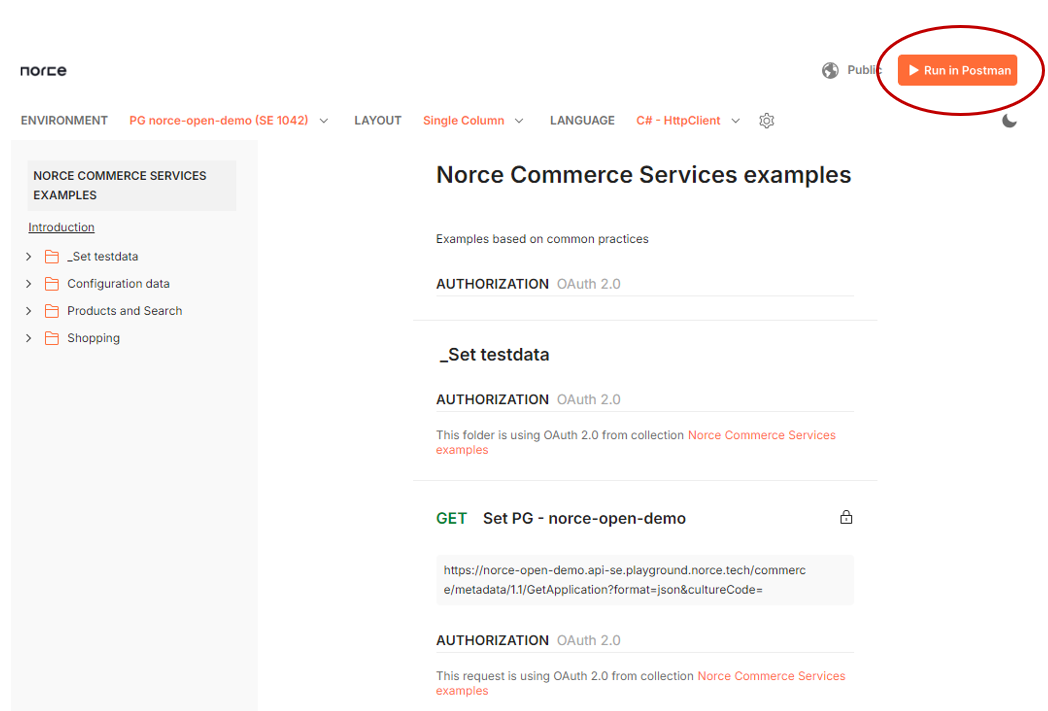
- Import a Collection: Open a collection link above and click “Run in Postman” to add it to your workspace.
- Select Environment: Choose the environment named "PG norce-open-demo (SE 1042)".
- Authenticate: In the collection's Authentication tab, click "Get New Access Token" and then "Use Token".
- Try Requests: Select a request and execute it to see results.
Image Description:
Screenshot of the Postman collection interface, showing how to select an environment and authenticate.
Default Access Rights in Example Environments
The default environment uses a public demo account with access to a single demo client in the playground environment. To use your own credentials:
- Duplicate the environment.
- Update
ClientId,ClientSecret, and other variables. - Rename the environment following the suggested naming convention.
The environment and collection design allows easy switching between clients by using multiple environments with the same example collections.
Configuring Postman for Your Own Norce Client
To use Postman with your own Norce Commerce client, you need:
- OAuth Client ID and Client Secret for your integration user.
- ApplicationId, Scope, and adminhost (for production).
- apihost for your client.
Setup Steps:
- Create a New Environment:
- Open the “Environments” window in Postman.
- Duplicate the "PG norce-open-demo (SE 1042)" environment.
- Edit variable values as needed.
- Rename the environment using the format:
[Environment] [slug] ([Application suffix] [ApplicationId]).
Examples: “PRD norce-prod-demo (COM xxxx)”, “PRD norce-stage-demo (EU yyyy)”.
- Update Variables:
Change the following variables to match your client:
| Variable | Description | Playground | Stage | Prod |
|---|---|---|---|---|
| adminhost | Admin UI host | [slug].admin-se.playground.norce.tech | [slug].admin-se.stage.norce.tech | [slug].admin-se.norce.tech |
| apihost | API endpoint host | [slug].api-se.playground.norce.tech | [slug].api-se.stage.norce.tech | [slug].api-se.norce.tech |
| applicationid | Application ID for API requests | See settings → application → application | same as playground | same as playground |
| oauth_scope | OAuth2 scope | "playground" (currently lab) | "stage" | "production" |
| oauth_clientid | OAuth2 client ID (from Norce) | provided by Norce | provided by Norce | provided by Norce |
| oauth_clientsecret | OAuth2 client secret (from Norce) | provided by Norce | provided by Norce | provided by Norce |
For personal integration users, create global variables for oauth_clientid and oauth_clientsecret in your private workspace. This reduces the risk of using incorrect credentials or sharing them unintentionally.
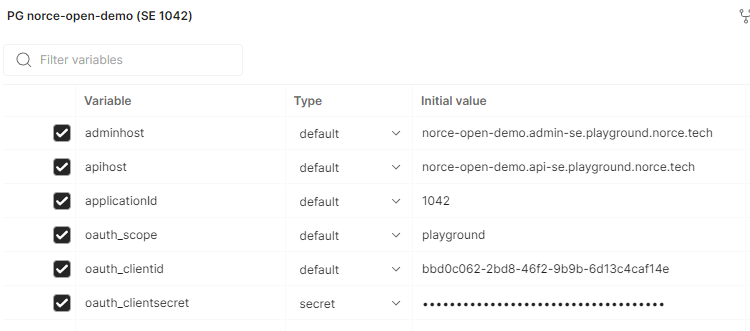
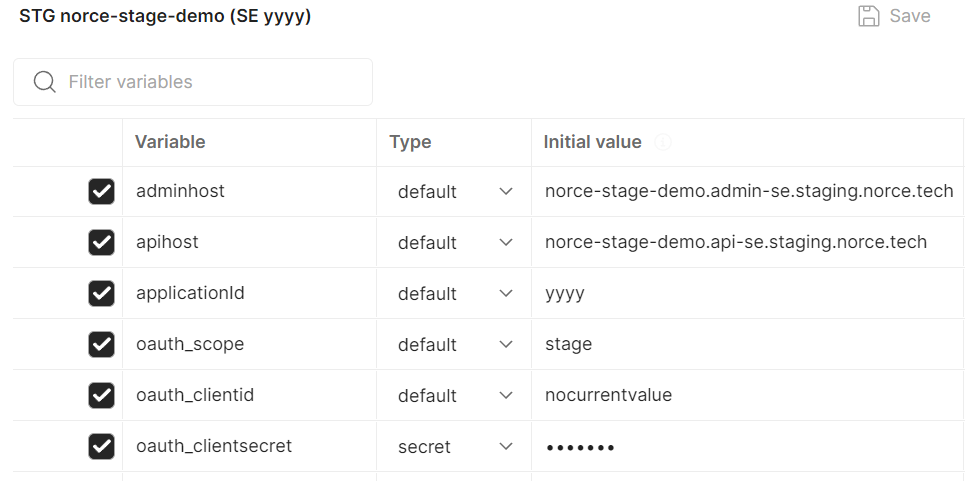
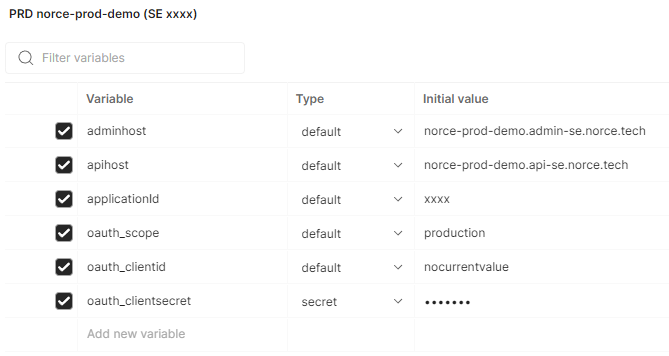
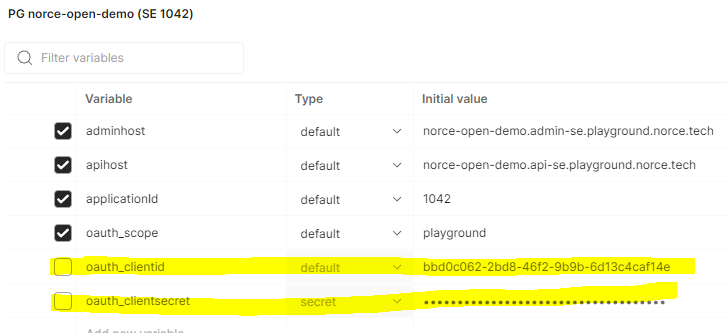
Example Environments
Image Descriptions:
- Playground environment configuration in Postman.
- Stage environment configuration in Postman.
- Production environment configuration in Postman.
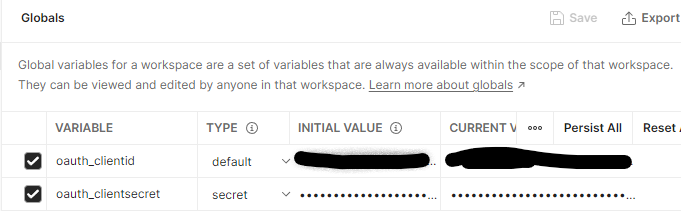
Using Global Variables for User Credentials
To apply your own access rights across all requests, add oauth_clientid and oauth_clientsecret as global variables and disable them at the environment level.
Image Descriptions:
- Global variables setup in Postman.
- Disabling environment variables in Postman.
Open Test Client
The "open demo" or "playground open demo" client provides test data and an open API for developers without a sandbox client.
- Admin UI logins are personal; request access via support@norce.io.
- The "PG norce-open-demo (SE 1042)" environment uses restricted credentials for demo clients only.
Tips and Best Practices
Collection Variables
All variables used in Norce's Postman collections are declared at the collection level. To customize, duplicate the "Set PG - norce-open-demo" request in the "_Set testdata" folder and adjust variables as needed.
Image Description:
Postman interface showing collection variables and the "Set PG - norce-open-demo" request.
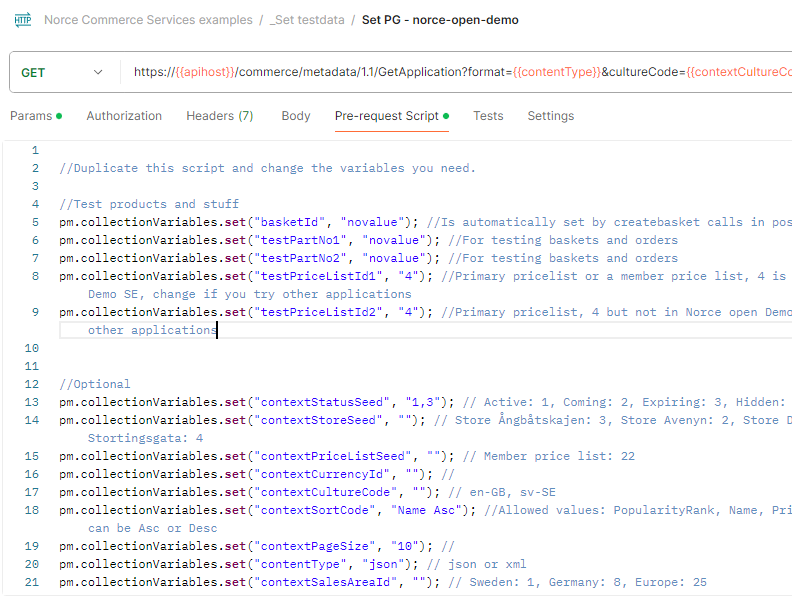
Variables named "context" are included to support persistent application contexts. You can set these variables to be included in all requests for your test scenarios.
Basket and Checkout Processes
The Norce Commerce Checkout examples include scripts for basket management. When you create a basket, the script stores the basketId as a collection variable, allowing you to reuse it in subsequent requests.